Install AGE & PSQL from Source


You can convert your existing relational database to a graph database by simply adding an extension. Apache AGE is a PostgreSQL extension that provides graph database functionality. It enables users to leverage a graph database on top of the existing relational databases.
We will take a look at
Installing Postgres from source.
Installing & configuring Apache AGE with Postgres.
Installing AGE-Viewer for Graphs analysis.
This article will explain to you how to install age on your Linux machine from the source. For macOS users, there is a detailed video for the overall installation process. Linux users can also watch this video as most of the steps are identical.
Getting Started
We gonna install the age and PostgreSQL from the source and configure it.
mkdir age_installation
cd age_installation
mkdir pg
cd pg
Dependencies
Install the following essential libraries before the installation. Dependencies may differ based on each OS You can refer to this for further details https://age.apache.org/age-manual/master/intro/setup.html#pre-installation.
So in case, you have ubuntu installed
sudo apt-get install build-essential libreadline-dev zlib1g-dev flex bison
It is also recommended to install postgresql-server-dev-xx package. These are development files for PostgreSQL server-side programming. For example if you are using ubuntu.
sudo apt install postgresql-server-dev-11
Further you can refer to https://age.apache.org/age-manual/master/intro/setup.html#postgres-11
Installing From source
PostgreSQL
Downloading
You will need to install an AGE-compatible version of Postgres, for now AGE only supports Postgres 11 and 12. Download the source package for postgresql-11.8 https://www.postgresql.org/ftp/source/v11.18/
Downloading it and extracting it to the /age_installation/pg
wget https://ftp.postgresql.org/pub/source/v11.18/postgresql-11.18.tar.gz && tar -xvf postgresql-11.18.tar.gz && rm -f postgresql-11.18.tar.gz
This will download the tar file for the Linux users and also extract it in the working directory.
Installing
Now we will install the pg. The —prefix have the path where we need to install the psql. In this case, we are installing it in the current directory pwd .
cd postgresql-11.18

# configure by setting flags
./configure --enable-debug --enable-cassert --prefix=$(pwd) CFLAGS="-ggdb -Og -fno-omit-frame-pointer"

# now install
make install

# go back
cd ../../
We should configure it by setting the debugging flags. In case of the macOS users
./configure --enable-debug --enable-cassert --prefix=$(pwd) CFLAGS="-glldb -ggdb -Og -g3 -fno-omit-frame-pointer"
AGE
Downloading
Now download the AGE from the GitHub repo https://github.com/apache/age. Clone it under /age_installation directory.
git clone https://github.com/apache/age.git
Installing
Now we will configure age with PostgreSQL.
cd age/
# install
sudo make PG_CONFIG=/home/imran/age_installation/pg/postgresql-11.18/bin/pg_config install
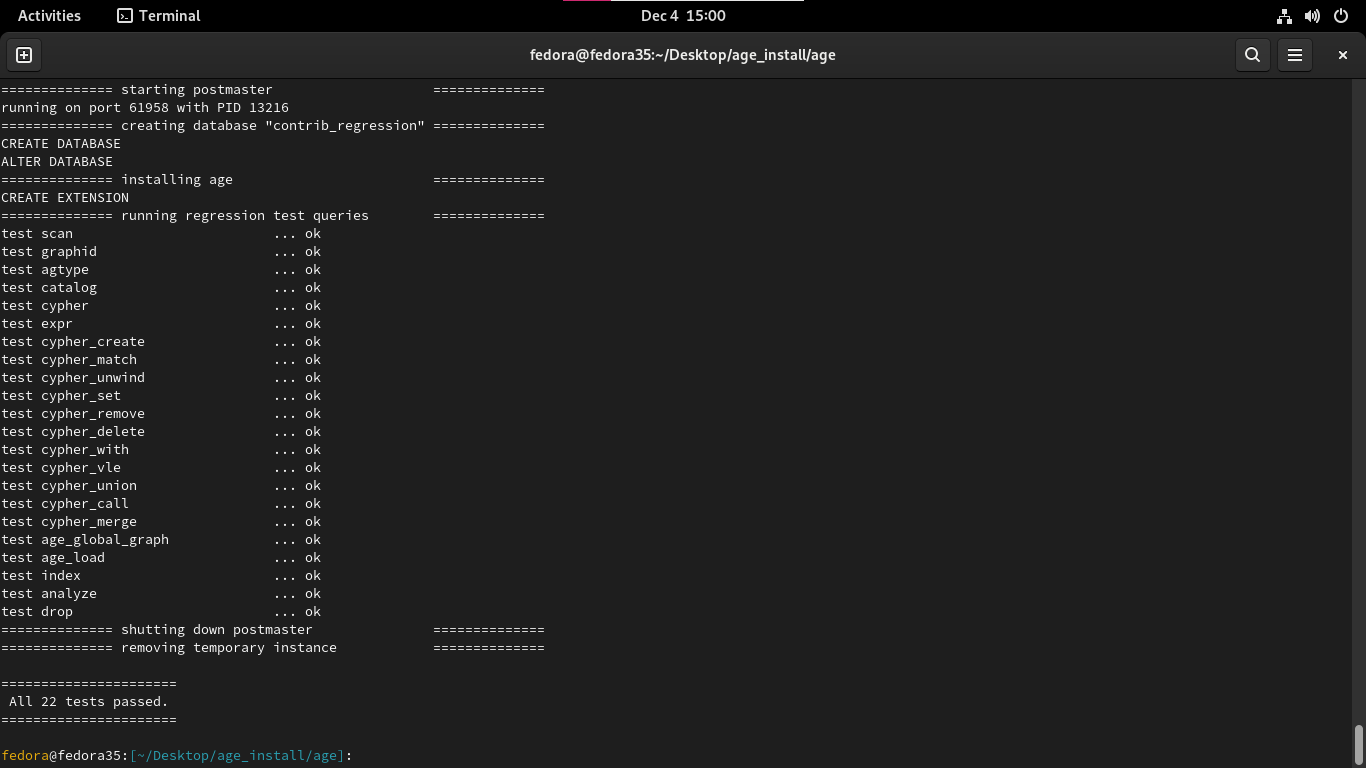
# install check
make PG_CONFIG=/home/imran/age_installation/pg/postgresql-11.18/bin/pg_config installcheck
PG_CONFIG require the path to the pg_config file. Give the path from the recently installed PostgreSQL.
DB Initialization
Now we will initialize the database cluster using the initdb
cd postgresql-11.18/

# intitialization
bin/initdb demo
So we named our database cluster demo.
Start Server
Now start the server and make a database named demodb
bin/pg_ctl -D demo -l logfile start
bin/createdb demodb
If you wanna change the port number use bin/createdb --port=5430 demodb
Start Querying
AGE added to pg successfully. Now we can enter in to pg_sql console to start testing.
bin/psql demodb
If you have server running on some other port like in my case it is 5430 use bin/createdb --port=5430 demodb
Now when you have initialize a new DB we have to load the AGE extension in order to start using AGE. Also, we need to set search_path and other variables if didn’t set them earlier in the /postgresql.conf file.
Note that you can also set these parameter in the
postgresql.conffile. See more
CREATE EXTENSION age;
LOAD 'age';
SET search_path = ag_catalog, "$user", public;
Now try some queries having cypher commands.
SELECT create_graph('demo_graph');
SELECT * FROM cypher('demo_graph', $$ CREATE (n:Person {name : "james", bornIn : "US"}) $$) AS (a agtype);
SELECT * FROM cypher('demo_graph', $$ MATCH (v) RETURN v $$) as (v agtype);

Installing AGE-Viewer
So age-viewer is a web app that helps us visualize our data.
Dependencies
Install nodejs and npm to run that app. You are recommended to install node version 14.16.0. You can install the specific version using the nvm install 14.16.0. You can install nvm from https://www.freecodecamp.org/news/node-version-manager-nvm-install-guide/.
sudo apt install nodejs npm

or

# recommended
nvm install 14.16.0
Downloading
Go back to directory /age_installation
git clone https://github.com/apache/age-viewer.git
Starting
Now set up the environment.
cd age-viewer

npm run setup
npm run start
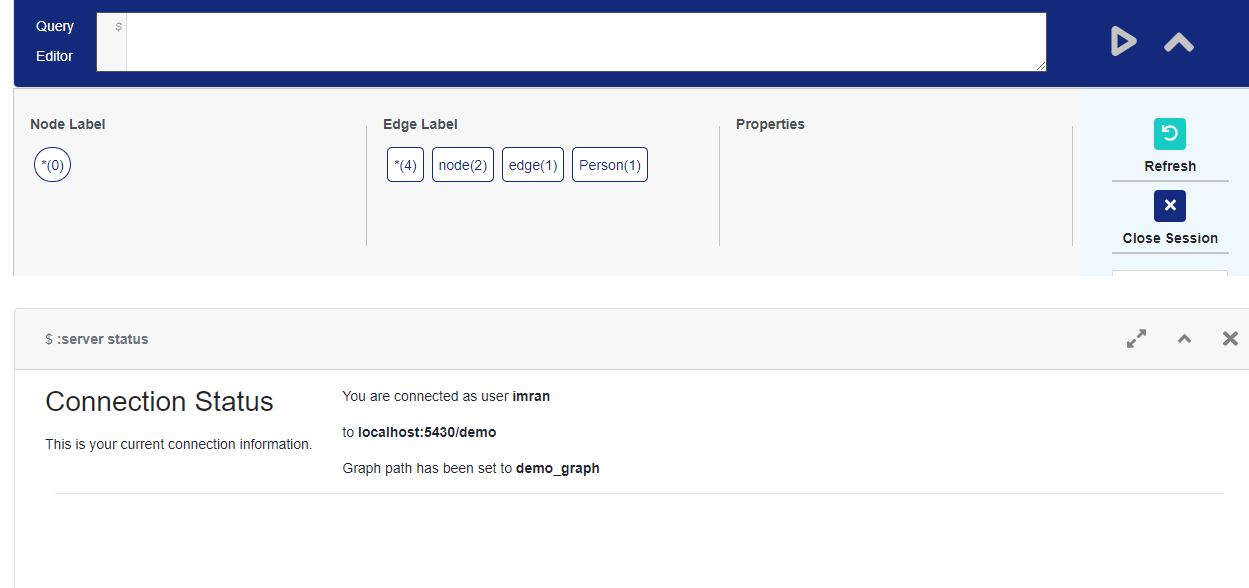
Viewer will now be running on the localhost. Now connect the viewer with the database server.Enter the details required to login
# address (default : localhost)
url: server_url;

# port_num (default 5432)
port: port_num;

# username for the database
username: username;

# password for the user
pass: password;

# database name you wanna connect to
dbname: demodb;
Note that If you are following the above steps and installed postgres form source, then postgres a user would be created automatically during the installation. The username will be same as the name of your linux user. In my case a user with name imran was created as my linux user name was imran. Also there would be no password on this default user, you can set the password later.
In my case i used the following settings.
url: localhost;

port: 5432;

username: imran;

# radom pass as password is not set for this user.
pass: 1234;

dbname: demodb;
Visualizing Graphs
Now try creating some nodes and then you can visualize their relationship on the age-viewer.
First we will create PERSON nodes
SELECT * FROM cypher('demo_graph', $$ CREATE (n:Person {name : "imran", bornIn : "Pakistan"}) $$) AS (a agtype);
SELECT * FROM cypher('demo_graph', $$ CREATE (n:Person {name : "ali", bornIn : "Pakistan"}) $$) AS (a agtype);
SELECT * FROM cypher('demo_graph', $$ CREATE (n:Person {name : "usama", bornIn : "Pakistan"}) $$) AS (a agtype);
SELECT * FROM cypher('demo_graph', $$ CREATE (n:Person {name : "akabr", bornIn : "Pakistan"}) $$) AS (a agtype);
SELECT * FROM cypher('demo_graph', $$ CREATE (n:Person {name : "james", bornIn : "US"}) $$) AS (a agtype);
SELECT * FROM cypher('demo_graph', $$ CREATE (n:Person {name : "david", bornIn : "US"}) $$) AS (a agtype);
Now creates some nodes of COUNTRY.
SELECT * FROM cypher('demo_graph', $$ CREATE (n:Country{name : "Pakistan"}) $$) AS (a agtype);
SELECT * FROM cypher('demo_graph', $$ CREATE (n:Country{name : "US"}) $$) AS (a agtype);
Now create a relationship between them.
SELECT * FROM cypher('demo_graph', $$ MATCH (a:Person), (b:Country) WHERE a.bornIn = b.name CREATE (a)-[r:BORNIN]->(b) RETURN r $$) as (r agtype);
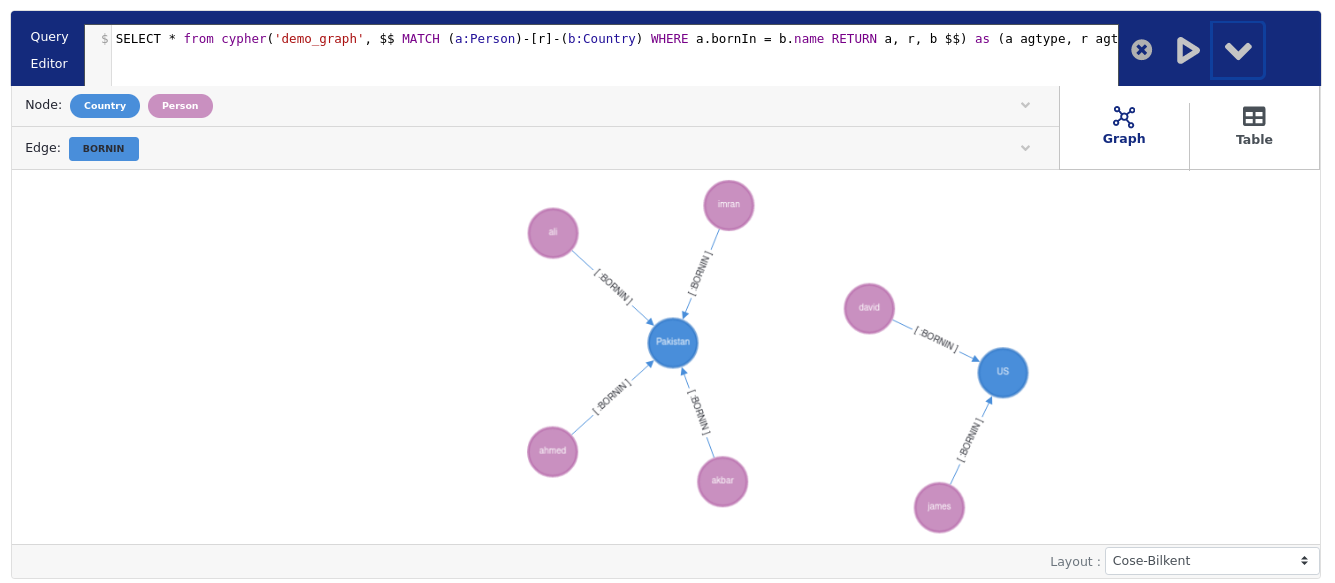
Now we can visualize our whole graph created.
SELECT * from cypher('demo_graph', $$ MATCH (a:Person)-[r]-(b:Country) WHERE a.bornIn = b.name RETURN a, r, b $$) as (a agtype, r agtype, b agtype);
Help
Config File
In case you want to change the port number (default5432) and other variables you can take a look at thedemo/postgresql.conf file. You have to restart the server after that. Setting the parameters here will save you from the initialization commands like LOAD 'age'; as used earlier.
nano demo/postgresql.conf

# In postgresql.conf file update and uncomment

port = 5432  #new port if wanted
shared_preload_libraris = 'age'
search_path = 'ag_catalog, "$user", public'
You can also set these variables using the commands shown earlier.
Error with WSL
When installing age-viewer. If you are using WSL restart it from PowerShell after installing node, npm using wsl --shutdown. WSL path variable can intermingle with node path variable installed on windows. https://stackoverflow.com/questions/67938486/after-installing-npm-on-wsl-ubuntu-20-04-i-get-the-message-usr-bin-env-bash
Now start WSL again. Don’t forget to start the pg server again after the WSL restart. Run server again using bin/pg_ctl -D demo -l logfile start .
Acknowledgment
These resources helped me a lot during the installation. You can also refer to these if help is needed.